SIGN UP FOR SALLY'S SEA OF SONGS NEWSLETTER!


Showing posts with label Classroom Set Up. Show all posts


Hallway bulletin boards don’t have to be a scramble each month. With a little advance planning, they can become a year-long showcase of student learning that reflects what actually happens in the music room.

This post shares a month-by-month outline of hallway bulletin board ideas designed specifically for elementary music. Each idea centers on real student work—compositions, reflections, photos, and creative responses—making it easier to document learning, celebrate progress, and rotate displays throughout the year without starting from scratch.

(If you’re looking for the rationale behind these ideas, including what counts as student work and how to include objectives and rubrics, start with my post on creating meaningful music bulletin boards with simple student work.)


Blog header image showing a music hallway bulletin board with student rhythm compositions and the title “How to Create Meaningful Music Bulletin Boards with Simple Student Work.”


How to Create Meaningful Music Bulletin Boards with Simple Student Work


Hallway bulletin boards can be especially challenging for music teachers. So much of what we do in class is active and sound-based — singing, playing, moving, and creating — that it’s not always obvious how to turn that learning into student work you can display. I, for one, hated to take time to get out pencils and paper!

But with a few intentional choices, elementary music bulletin boards can become meaningful snapshots of learning, helping hallway bulletin boards show what students are really doing in music class.

(If you’re thinking more about instructional displays inside the room, I shared ideas for that in a previous post on making classroom walls work for you. This post focuses specifically on hallway boards.)


Why Student Work Belongs on Music Hallway Bulletin Boards


When students see their work displayed in the hallway, it sends a powerful message: what we do in music matters. It builds pride and ownership, while also quietly advocating for your program.

Parents, administrators, and other students may never sit in on a lesson, but they do walk past your hallway board. A display that features real student work helps them see that music learning is creative, intentional, and standards-based.

In practice, this might look like a rhythm composition display mounted on leaves or flowers, surrounded by photos of students creating. Or a concert reflection board with short student quotes paired with rehearsal pictures. Even a “Caught Making Music” photo collage counts as student work when it documents the learning process.


What Counts as Student Work in the Music Classroom


Elementary music hallway bulletin board showing student work for the song “Star Light, Star Bright,” including rhythm notation and photos of students playing instruments.
One of the biggest hurdles with hallway displays is defining student work in a subject where learning happens in sound.

Student work can include:
  • Rhythm or melody compositions
  • Short written reflections or sentence starters
  • Drawings connected to music stories
  • Group-created work
  • Photos of students singing, playing instruments, moving, or composing
If students made musical decisions, engaged in the process, or reflected on their learning, it counts!


What to Include on a Meaningful Music Bulletin Board


When planning hallway boards, think documentation, not decoration. A strong music bulletin board often includes a mix of:

  • Student work (compositions, reflections, drawings, group pieces)
  • Photos of students making music
  • A clear lesson objective
  • Music standard(s)
  • A short rubric or success criteria
  • Student voice (quotes or reflection prompts)

You don’t need all of these every time. Even three or four elements can turn a hallway board into a clear snapshot of learning.


Fall-themed elementary music bulletin board showing rhythm composition standards and a rubric exemplar displayed inside oak leaf shapes.

Sample Rhythm Composition Bulletin Board (Objective, Standard, and Rubric)


Including an objective, standard, and rubric doesn’t have to be complicated. A single half-sheet posted beside the display is enough.

Objective
Students will create and notate a 4-beat rhythm pattern using quarter notes and paired eighth notes.

Standard
MU:Cr1.1.2a – Generate musical ideas within a given structure.

Simple Rubric

4 – Exceeds: Accurate rhythm, clear notation, neat presentation
3 – Meets: Accurate rhythm with minor notation errors
2 – Developing: Some note value errors
1 – Beginning: Incomplete or unclear rhythm

This small addition does a lot of heavy lifting — it shows what students learned, how their work was assessed, and how creative projects align with standards.  


One important note: I never display student work in the hallway with grades written on it. I use the rubric to guide assessment and then choose examples that meet the criteria, but the papers themselves stay ungraded. Ungraded hallway displays promote a growth mindset by emphasizing progress and learning over performance labels.

Music Bulletin Board Ideas That Show Real Learning


Fall-themed music bulletin board displaying rhythm composition standards and a rubric exemplar for elementary music students.

Some hallway-friendly ideas that work especially well in music include:
  • Rhythm composition galleries (leaves, flowers, shells, notes)
  • “Caught Making Music” photo boards
  • Concert or field trip reflection displays
  • Music story connections (like sound stories or children's literature)
  • “Behind the Music” boards that highlight one focus skill

Each one helps answer the hallway question: What do students actually do in music class?

(If you’re looking for inspiration across the entire school year, I’ve also put together a full post with year-long music bulletin board ideas made with student work, organized month by month.)


How to Keep Music Hallway Bulletin Boards Manageable


Hallway boards shouldn’t steal your planning time.

A few tips that help:

  • Reuse the same background and swap out student work
  • Rotate displays by unit, not by month
  • Feature different grade levels throughout the year, so every class gets a turn in the spotlight
  • Use group work when possible
Remember: photos count as student work!

Thoughtfully rotating grade levels and displays turns your hallway board into an ongoing story of growth, creativity, and progress.


Let the Music Be Seen


Elementary music student rhythm compositions displayed on flower-shaped worksheets as part of a Blooming Rhythms bulletin board.

Music learning is often invisible — unless we help others see it. Hallway bulletin boards give us a simple way to advocate for our programs, celebrate students, and document learning without saying a word.

When student work, photos, objectives, and rubrics live together on the wall, your board becomes more than decoration. It becomes evidence.


If you’re looking for an easy place to start, my Falling Rhythms (fall leaves) and Blooming Rhythms (flower theme) rhythm composition sets are designed with hallway displays in mind — with assessment and standards already built in, so you can spend less time at the bulletin board and more time making music.


Musically yours,


The start of the school year brings a special kind of chaos: new supplies, new faces, and lots of bulletin board paper.

But let me ask you this: How much of what you hang on your walls actually helps you teach?

If you’ve ever printed, laminated, and posted something just to realize... you never actually use it—this post is for you.

Here’s how to choose decor that does more—helping you reinforce routines, build independence, and save your teacher voice all year long.


In our last chapter, we dove into the art of organizing and managing Music Centers, navigating the waters of strategic crescendos and harmonious learning seas. Now, as our musical tale unfolds, let's journey further into the melody maze and explore specific activities that transform your classroom into a haven of musical discovery.


The instruments are tuned, the stage is set, and the melody awaits your magical touch. Join me on this rhythmic odyssey, where each station is a musical adventure ready to unfold! 🌊🚀

1. Tech Station: 🎮💻 Explore the digital realm with Boom Cards, Google Slides, or interactive Quaver activities. Let your young musicians embark on a tech-savvy journey, where the language of music meets the language of technology. For a captivating resource, check out our Digital Music Resources category in the shop.

2. Game Station: 🎲🎶  Enhance vocabulary through engaging games like Squirrel Fun Dynamics Match or Music Symbols Memory Match. Turn the learning process into a playful composition! Amp up the fun with our Music Centers Activities category available in the shop.

3. Movement: 💃🎵 Let the rhythm guide their feet! Engage in Freeze Dance or explore scarf movement patterns for a harmonious blend of music and motion. Use engaging movement cards like this Movement Cards Bundle for inspiration.

4. Instrument Identification: 🎺🔍 Stimulate their musical minds with flashcards or matching activities, connecting pictures with instrument names for an interactive learning experience. Elevate this station with our Instruments of the Orchestra resources available in the shop.

5. Singing or Instrument Playing: 🎤🎸 Elevate the melody with a station dedicated to singing or instrument playing. Unleash the joy of making music firsthand! 

6. Worksheet or Writing Center: 📝🎼 Foster creativity through note writing, composition exercises, vocabulary building, or intriguing composer biography questions. Enhance this station with our Write the Room resources from the shop.

7. Notation Creation Station: 🧱🎵 Build musical landscapes with Legos, Play-Doh, chenille stems, or other materials. Let imaginations soar as students bring notes and rhythms to life. 

8. Composition: 🎼🌟 Unleash budding composers with manipulatives or worksheets. Watch as their musical expressions take shape! Dive into composition with our Composition Activities available in the shop.

9. Musical Books/Library: 📚🎶 Cultivate a love for music literature with a dedicated library. Immerse in tales that resonate with musical notes. Explore Bringing the Pages to Life for a captivating list of books for your musical library.

10: Vocal Explorations: 🎤🌀 Embark on a vocal adventure using ribbon, yarn, or chenille stems to craft curvy pathways for young voices to follow. Choose a favorite pathway, whether it's a gentle swirl or an adventurous loop, and bring it to life on a worksheet. Display it proudly on a bulletin board, share the vocal journey with the class, or take it home to enchant family members. Explore a variety of digital vocal explorations, each accompanied by its worksheet, available in the Vocal Explorations category in the shop. 


These center activities are the key to creating a melody maze that keeps the rhythm of learning alive and thriving in your elementary music classroom. However, remember the first two tips in the previous post Start Slow & Steady and Choose Activities with Purpose. It will be too much to have all 10 of these centers running in your classroom at the same time!  Choose only the activities that will meet the goals of your current unit. Depending on your class size, 4-5 centers are usually plenty to manage.


Which station will be your students' favorite musical pitstop? Share your musical center adventures below!


Musically Yours,


Welcome, fellow music educators! Today, let's dive deep into the intricacies of organizing and managing Music Centers in our elementary classrooms. Navigating these musical waters can be a bit tricky, but fear not; I've got a set of procedures to help you sail through with ease.


Choose & Manage Music Centers: Orchestrate a Symphony of Learning

Start Slow and Steady 

Begin your musical journey cautiously by introducing one grade at a time, one class period at a time. Expand gradually as both you and your students gain experience and success. This approach ensures a smooth sailing experience for all.

Choosing Activities with Purpose

Delve into activities that either review previously taught concepts or offer extra practice. This strategic selection keeps the learning ship sailing in the right direction.

Pre-teaching for Success

Set the stage for triumph by preteaching activities with the whole group. Whether it's playing a game together, creating a brief instructional video, or having a small group of students demonstrate, laying the groundwork over multiple class periods is key.

Manageable Group Sizes

Keep things harmonious by limiting group sizes to 3-4 students. Pre-selecting groups in advance helps to maintain order and minimize behavioral hiccups.

Setting Clear Expectations

BEFORE the musical voyage begins, establish expectations for gameplay, cleanup, movement, and more. Clear guidelines ensure a smooth and focused session for everyone involved.

Structuring Center Movement

Decide on your preferred center movement approach—set rotation times (for example: 10 minutes per station) or free movement between stations (for example: students may move to any station with less than 4 students currently in the station). Tailor this decision to the nature of the activities; for instance, free movement works well for independent activities like write-the-room.

Assigning Group Jobs

Enhance teamwork by assigning or allowing students to choose group jobs. From readers to materials managers, giving each student a role fosters a collaborative atmosphere. Some job ideas are reader (reads task card), materials manager, checker (holds an answer key), recorder (writes things down), reporter (shares a report of the group to the class), time keeper. These roles can even switch within the designated time frame, adding variety to the musical mix.

Balancing Sound Levels

Maintain a harmonious atmosphere by carefully choosing activities that involve making musical sounds. Limit these activities to one or two centers to prevent the room from becoming a cacophony. Similarly, thoughtfully select instruments, considering their volume levels to create a conducive learning environment. As we all know, some are naturally louder than others!


Prepare Center Materials: A Key Prelude to Harmony


Before you embark on the Music Center journey, take a moment to tune your materials for the perfect pitch in your classroom symphony. Just as a well-prepared orchestra ensures a smooth performance, having everything assembled and easily accessible sets the stage for an orchestrated learning experience.

Gather Materials in Advance 

Collect all necessary materials for each center activity beforehand. From instruments to worksheets, make sure everything is in good condition and ready for action.

Organize Materials for Efficiency

Arrange materials thoughtfully to minimize setup time during class. Utilize storage bins, labeled containers, or shelves to maintain a neat and accessible setup. Read more in this post on creating File Folder Centers.

Create Clear Instructions

Prepare clear, concise instructions for each center activity. Include diagrams or visual aids to assist students in understanding and completing tasks independently.

Double-Check Availability

Confirm that there are enough materials for all groups to participate simultaneously. Have a backup plan or alternative activity in case any materials need quick replacement.

Consider Student Accessibility

Ensure that students can easily reach and manage the materials assigned to their group. Optimize the layout to promote independence and minimize disruptions during transitions.

Test Run the Setup

Before the class arrives, do a quick test run of the center setup to catch any potential issues. Make adjustments as needed to streamline the process for both you and your students.

Foster a Collaborative Environment

Encourage students to assist in setting up and cleaning up their designated centers. Promote a sense of responsibility and teamwork to make the process smoother and more efficient.

Incorporating these steps into your routine transforms the preparation phase into a harmonious prelude to your Music Center sessions. A well-organized setup ensures that your teaching days unfold with ease, allowing you to focus on the joy of making music together. 


Conclusion

As you embark on your Music Center adventure, remember these tried-and-true procedures. With careful planning and thoughtful execution, you'll find your teaching days flowing smoothly, much like a calm sea under a clear sky. Happy sailing, fellow educators!


Musically yours,


As we navigate the wild world of music teaching, especially in the program-heavy month of December, I've brewed up a piping hot blog post to share some sanity-saving tips. Picture this: juggling rehearsals, concerts, and the regular classroom shenanigans. Oh, wait. You don't have to picture it, you are living it! I get it—there's no tired quite like musician/teacher tired in December. So, let's dive into a conversation soaked with practical wisdom. 

Today's jam: Tips for Closing Your Music Classroom for the Holiday Break. 

TIP 1. Put away everything from the last concert/performance. 

I am writing this in December and I KNOW from experience that you had multiple concerts in this week or so before winter break. I also know that you are tired. (And maybe sick. How many times did I lose my voice in December?!) Don't be afraid to ask for help if you need it! Wrapping up all the loose ends from those concerts feels so good! 

TIP 2. Clean off your desk. 

Or at least organize what is there. It was always helpful if I left myself a note or set out memos to my future self that I needed to address that first day back. Put those memos right where you can see them when you first walk in. 

TIP 3. At least consider what you will be teaching on the first day back. 

You may not have the time or energy to complete your lesson plans, but giving some thought to what might get you through the first day or two and then locating any instruments or manipulatives is very helpful.  As I gained experience and a bank of past lesson plans, it was easy enough to take a quick look at last year's plan and choose which part of that could be tweaked and reused. However, especially in my early years of teaching when I didn't have that bank of plans, I couldn't muster the energy to actually write the plans during those last few crazy days in December. I always found it easier to write my actual lesson plans after I had had a few days off.  It sure was nice to have something in mind to get me through that first morning!

TIP 4.  Check your email. 

Depending on how busy you have been leading up to the break, look through the last week or two worth of emails. One recent year, I had been so busy & stressed that I totally missed a one-sentence instruction at the very end of an email (that I had apparently only scanned) and I reported to the wrong building on the first day back from winter break.  Save yourself the embarrassment and just double-check to see that you didn't miss something.

"Future You"

The first day back after a break brings its own set of stresses (i.e. will my computer turn on or be stuck updating all morning?), but it sure is nice to come into a clean room, with a clean desk, and ready for a fresh start. "Future You" will thank you! Take care of yourself and enjoy your break!


Musically Yours,


Any other bargain shoppers out there? Just me? Oh, I'm sure some of you will join me in enjoying a good sale! Black Friday and Cyber Monday have become synonymous with bargains. Here are some of the things that I have found useful for me and for my classroom.

**This post contains affiliate links and I will be compensated if you make a purchase after clicking on my links. I only recommend products that I know and love.

We all want our music classrooms to feel warm and inviting. How many of us have taken hours setting up and decorating the music classroom in preparation for that first week of school? My hand is raised! 

Pinterest-worthy classroom photos found on social media add to the temptation to over-decorate. How can I make my music classroom cute while providing the best environment for students? Here are some tips to consider as you decorate your classroom for music learning.
This is a blog post by Sally's Sea of Songs on setting up file folder centers in an elementary music classroom.


Streamline Your Classroom with File Folder Centers

Working together in small group centers is a powerful way to reinforce learning in any subject, and music class is no exception. But let’s be honest: the thought of managing endless papers, game boards, and puzzle pieces can feel overwhelming! When my administration first encouraged me to try centers in the music room, I was skeptical.

The solution? A simple, effective File Folder System I adapted after seeing a colleague’s classroom in action. Here’s how you can set it up for your own students:

How to Create File Folder Centers

Step 1: Gather Your Supplies

You’ll need:
  • File folders
  • A title card (or neatly printed label)
  • A task card
  • Scissors
  • Glue stick
  • Envelope

Step 2: Attach the Title and Task Card

Glue or tape the center title card and task card to the outside front cover of the file folder. This ensures everything is clear and easy to identify at a glance.


Step 3: Add an Envelope for Storage

On the back cover of the file folder, attach an envelope. This will serve as the perfect storage spot for small game pieces, cards, or other loose materials.


Step 4: Laminate for Durability

Open the folder and laminate the entire thing. The lamination will keep it sturdy through lots of use. Don’t forget to carefully slit open the top of the envelope once laminated to ensure it’s usable!


Step 5: Trim Excess Lamination

After laminating, trim any extra film around the edges. Now you can store smaller items in the envelope and larger materials or worksheets inside the folder.


Pro Tips for File Folder Centers

Here are some creative ways to adapt your centers for maximum use:
  • Glue Game Boards Inside
    • Keep game boards secure by attaching them directly to the inside of the folder.
  • Laminate Closed Folders
    • For extra durability, laminate the folder while it’s closed. Carefully slit open the top afterward. This method limits space but offers more protection for items inside.
  • Use Dry Erase Markers
    • Laminate questions or puzzles inside the folder and add a dry erase marker to the envelope. Students can write and wipe as they go!
  • Organize Task Cards
    • Decide where task cards work best for your activity: on the front cover, inside the folder, or laminated separately and stored loose within the folder.
  • Try Pocket Folders
    • Pocket folders without prongs can be a great substitute for file folders. They’re also easy to laminate for extra durability.

Why File Folder Centers Work

This system has been a game-changer in my music room! It keeps materials organized, portable, and easy to manage during transitions between classes. And the best part? Almost any small group activity can fit neatly into a file folder—tailored to your curriculum and students' needs.

Looking for inspiration? Game boards, puzzles, and task cards are all great starting points. I’ve even seen some excellent file folder center books in local teacher stores—though, unfortunately, music-specific options are hard to come by. That’s why I started creating my own!

Ready to Dive In?

If you’re curious about File Folder Centers or want ready-made examples to get started, check out my Tile It! Letter Tile Spelling Centers and other music center resources.

[Click the image to explore more center activities!]


Musically yours,


p.s. Check out more great blog posts at the Fermata Fridays linkup!


We spend so much time in our classrooms - they need to be beautiful and functional!  Thank you to The Bulletin Board Lady-Tracy King for suggesting that we share our music rooms with everyone.  Here is a peek at my beginning-of-school bulletin boards.

I am very fortunate to have a huge long bulletin board on one wall of the classroom.  I have found it easier to manage when I separate it into four separate sections.  Here is the "work in progress" pic of all four sections:


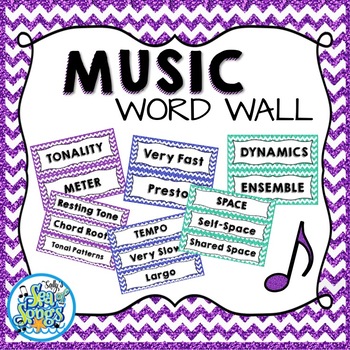
The first section, the prime real estate, contains the terms associated with meter and tonality because we work with those terms all the time.


The second section will get changed every so often.  We're starting out the year with steady beat and tempo, so I decided to get my Tempo Cats out again this year.  They are quite old, but I take them out of the rotation some years so that when I do use them, they are new, especially to the younger students.  Please check out my 2nd Grade tempo lesson ideas using music from the Carnival of the Animals!  Here is the link:  Behind the Scenes at the Carnival of the Animals - Tempo.


Next, is my Composer of the Month section.  Well, truthfully, it is just the Composer section.  I don't always get it changed every month!  My district has specified certain composers that each grade level should focus on, so I do get at least 6 different composers up during the course of the year.  This year, I am starting out with the great set on Bach from Music with Sara Bibee. The picture of Bach and the organ poster come from very old sets of composer & instrument posters.  I think they have been in my room for 20 years!


The last section of this long board contains my movement words based on Laban's basic efforts.  It is good for students to be able to verbalize what they are doing, and having these words available adds appropriate terminology to our class discussions.   


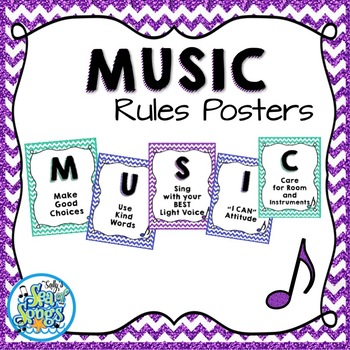
In the front of the classroom, right next to the SmartBoard, are the MUSIC rules and I CAN statements.  The I CAN statements are new to me this year.  I put them up with magnets because I am really unsure if I want all of them to stay up all year, or if I should just put the focus statements up.  You can read about my pack rat magnet success here.


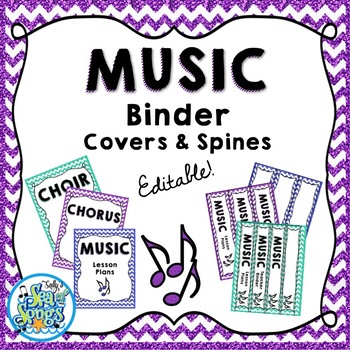
All of these word wall words (and more), music rules, and coordinating binder covers are available in my Teachers Pay Teachers shop.  


Now, perhaps you noticed that I didn't share any pics of shelves or desk or closet.  There's a reason for that! :)  I'm going to be looking through all of the other links for some great organizing ideas to get my paperwork under control!  You can check out the other music rooms by clicking on the picture below.  Thanks for taking my tour!